MFA Guide
Electronic Signature And Multi-Factor Authentication
Getting Started
You can only sign documents if your file is complete and you have access to the Tax Forms page:
Step 1
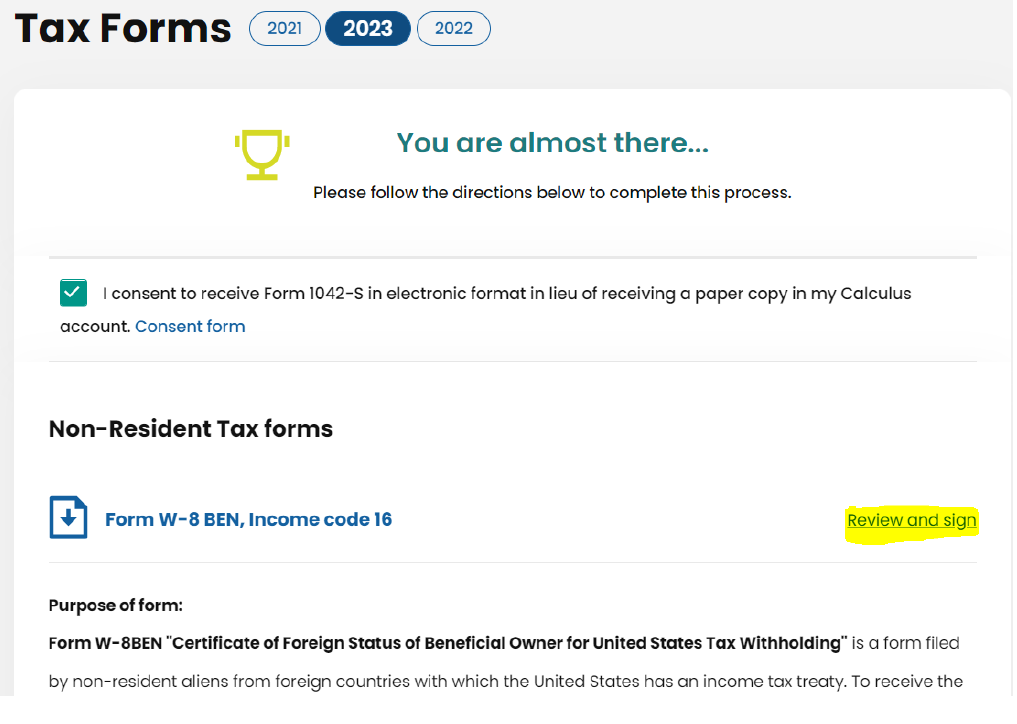
When you access your Tax Forms page, you will see the form you need to sign with text "Review and sign". You have to click on this text to proceed to the next step.
Step 2
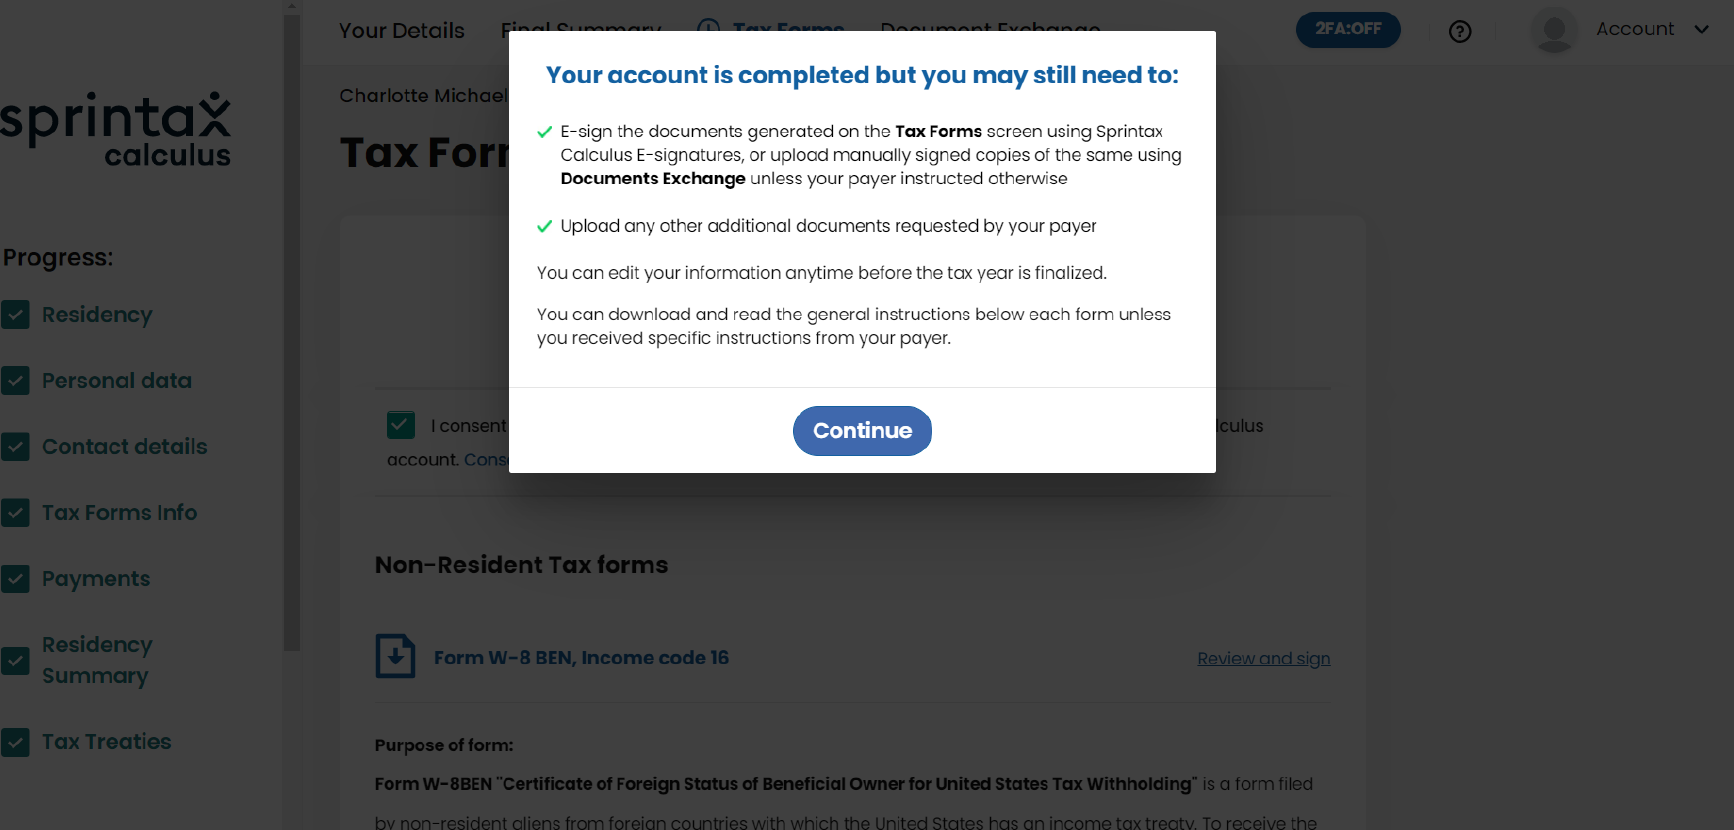
Multi-factor authentication is required in order to place a signature on your form. You can activate MFA from the MFA menu on the top of your screen at any time, even before your file is complete:

Or you will be requested to activate MFA if you choose to sign the document electronically.
Step 3
Multi-factor authentication process
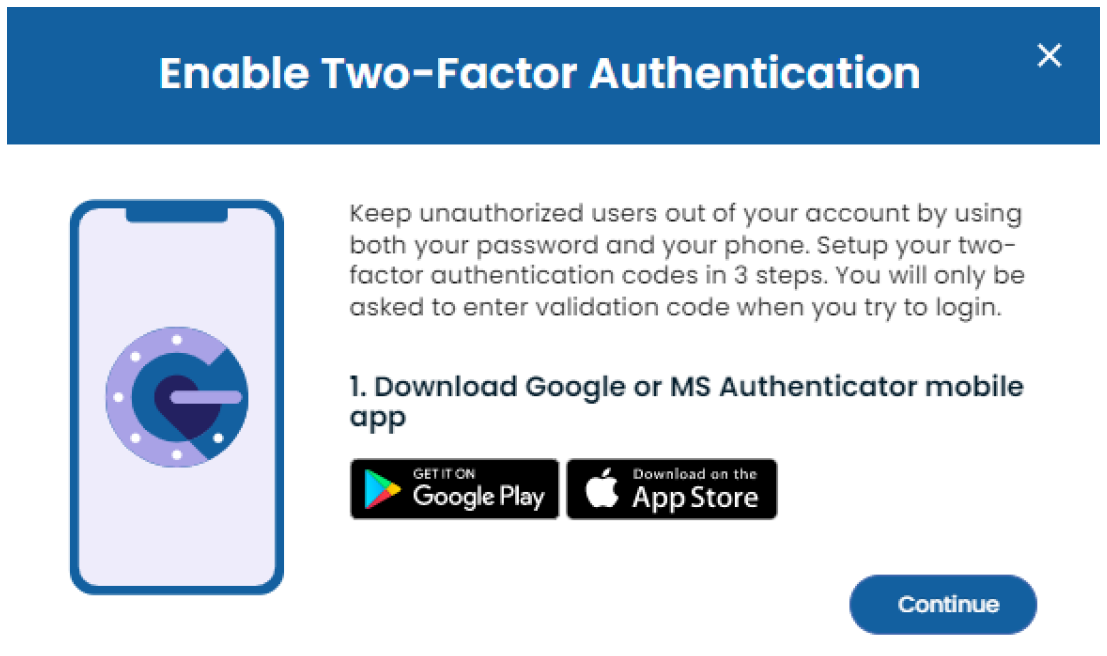
- Press "Continue" on the screen in Step 2 in your browser
-
You will see a QR code on your screen
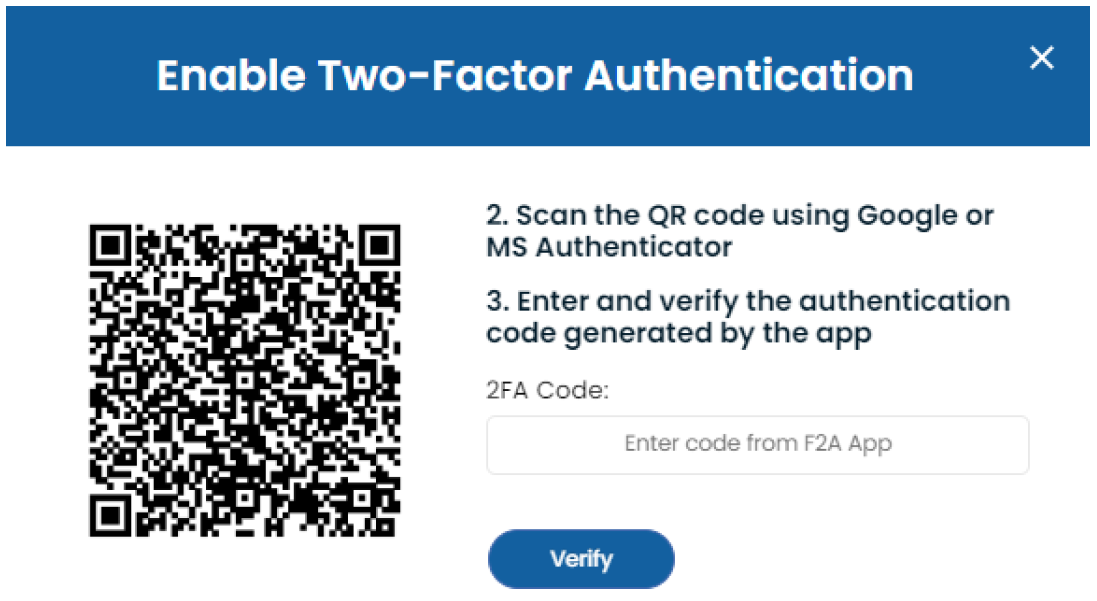
- Download an authenticator application on your mobile (MS Authenticator or Google Authenticator)
- Go to Settings/Add new account in the authenticator application
- Scan the QR code on the screen in your browser (point 2)
-
Check if your new account with the name "Sprintax Calculus" is created on the authenticator app on your mobile

- Go back to your browser and press the "Verify" button
You will notice that the 2FA will reflect 'On'.

Important: The 6-digit code in the Authenticator app refreshes every 30 seconds. When you are asked to enter the 6-digit code, it needs to be within the 30 seconds limit, otherwise, you'll be prompted to enter the code again. Please, do not delete the Sprintax Calculus account in the Authenticator app to maintain your access to your Sprintax Calculus profile.
Step 4
Digital signature process
- Press "Review and sign" as shown in Step 1
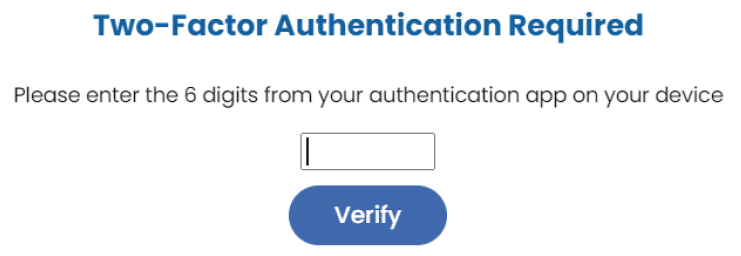
- You will be required to enter the 6-digit code from your authenticator again (points 9 and 10 above)
-
You will see the "Review and sign" screen below:
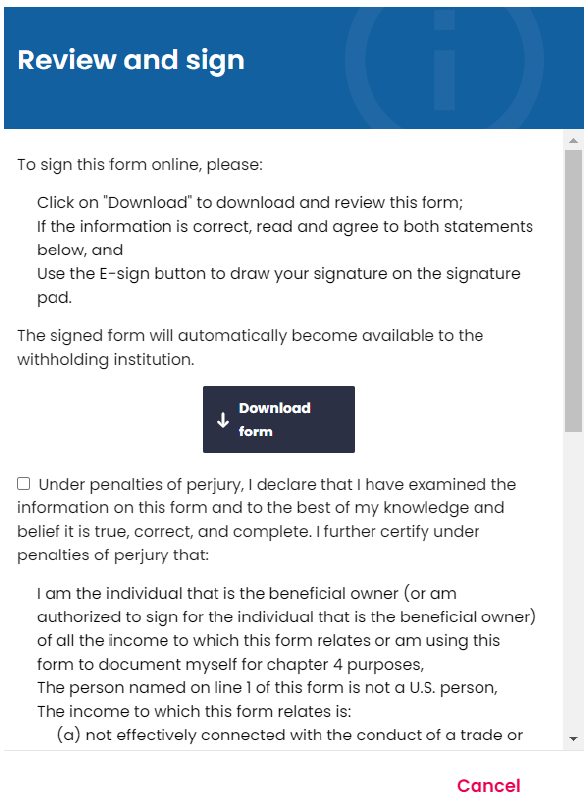
- You must download your form by selecting the button "Download form" and review for any inconsistencies
-
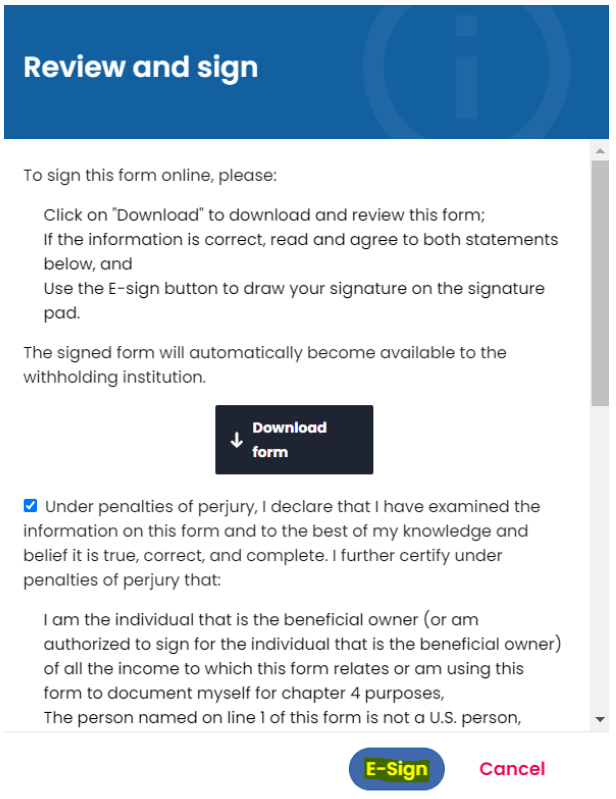
You must read and check the tick boxes for both declaration and agreement, and only then you will see a new button "E-sign"
-
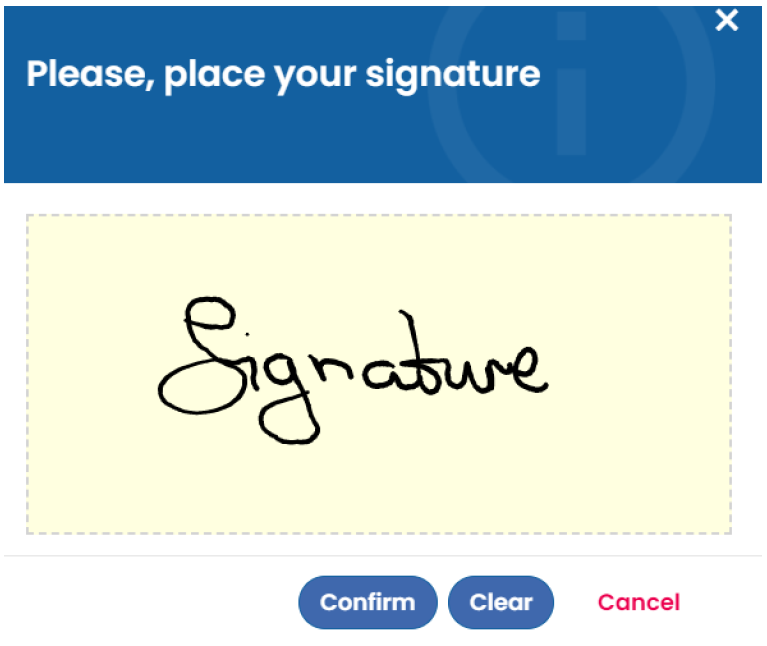
Add signature screen:
When you select the icon, a new screen pops up labelled "Please, place your signature" where you can place your signature with an e-pen, PC mouse or any other graphic tool you may have. Once done, hit the "Confirm" button.
View and location of the signed forms:
Signed W-8BEN form:
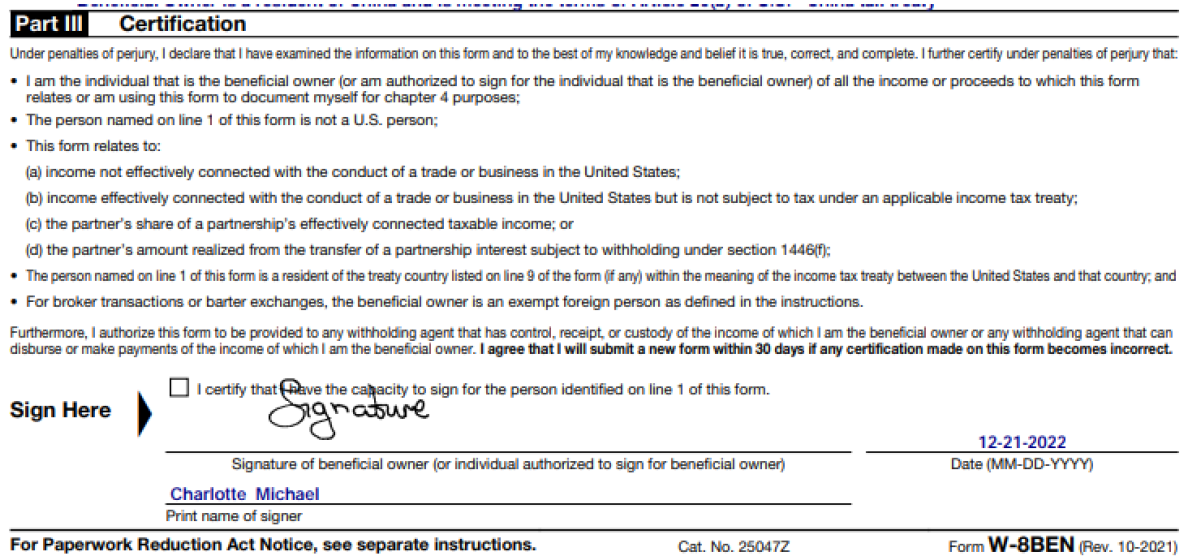
Identity statement in pdf file. This is the second page of the signed form.

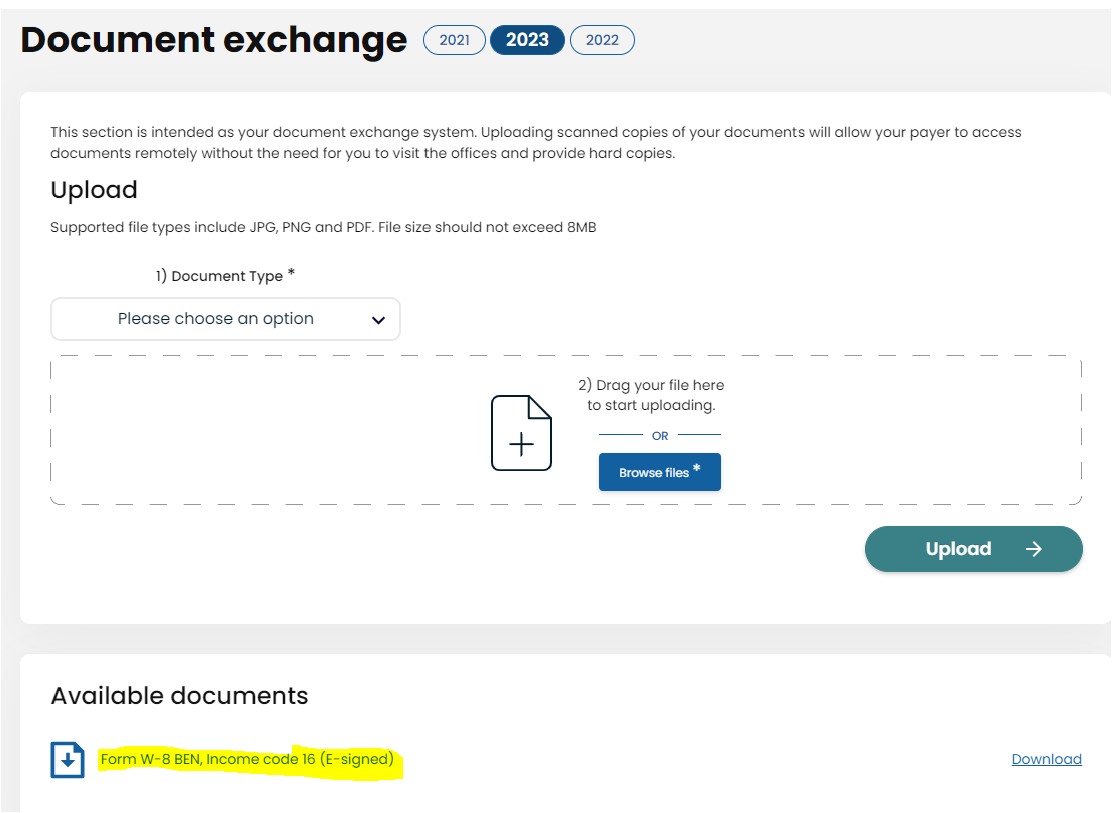
The signed forms are also automatically uploaded in the Documents Exchange:
Disable MFA
If you wish to disable MFA after you have activated it for your account, click MFA at the top of the page once you are logged.

Click "Confirm" and enter a 6-digit code from your Authenticator's app.


